Hi all, I've been away on a long holiday in Europe so there hasn't been any activity for a while, but I guess you will have noticed that.
Anyway I'm back into it now with renewed enthusiasm and the focus is on getting the chassis rolling again as I have been asked to put the project on display at Kumeu January next year. This will be a lot easier to achieve if the whole thing is on wheels, which means finishing off the Jag rear.
You will recall I had many of the components chrome plated (so it should be a real feature of the car when done, but all that bling would be a complete waste of money if the mechanicals weren't rebuilt as well, now its time to start the rebuild/reassembly.
First up I purchased 4 universals via Peter Farrant at Auckland Balance and then had him install these. I have prepared a short video so you can see the part I am talking about, how it works and what is involved.
Now that is very simplified. The reality was quite involved. Its not easy getting press fit parts like this to come apart (thanks to Bill Dobbin for his help with that before I got all the chroming done) and a lot of patience is required when reassembling too. This was made all the more difficult by the fact that the holes where the universals get pressed into had some chrome in them. This is a problem for two reasons, firstly the tolerances are so tight that a layer of chrome means things just don't fit. Secondly chrome peels once its damaged so if the cups being pressed in broke away a piece of the chrome, that tear would just keep running and basically ruin the chrome plated finish.
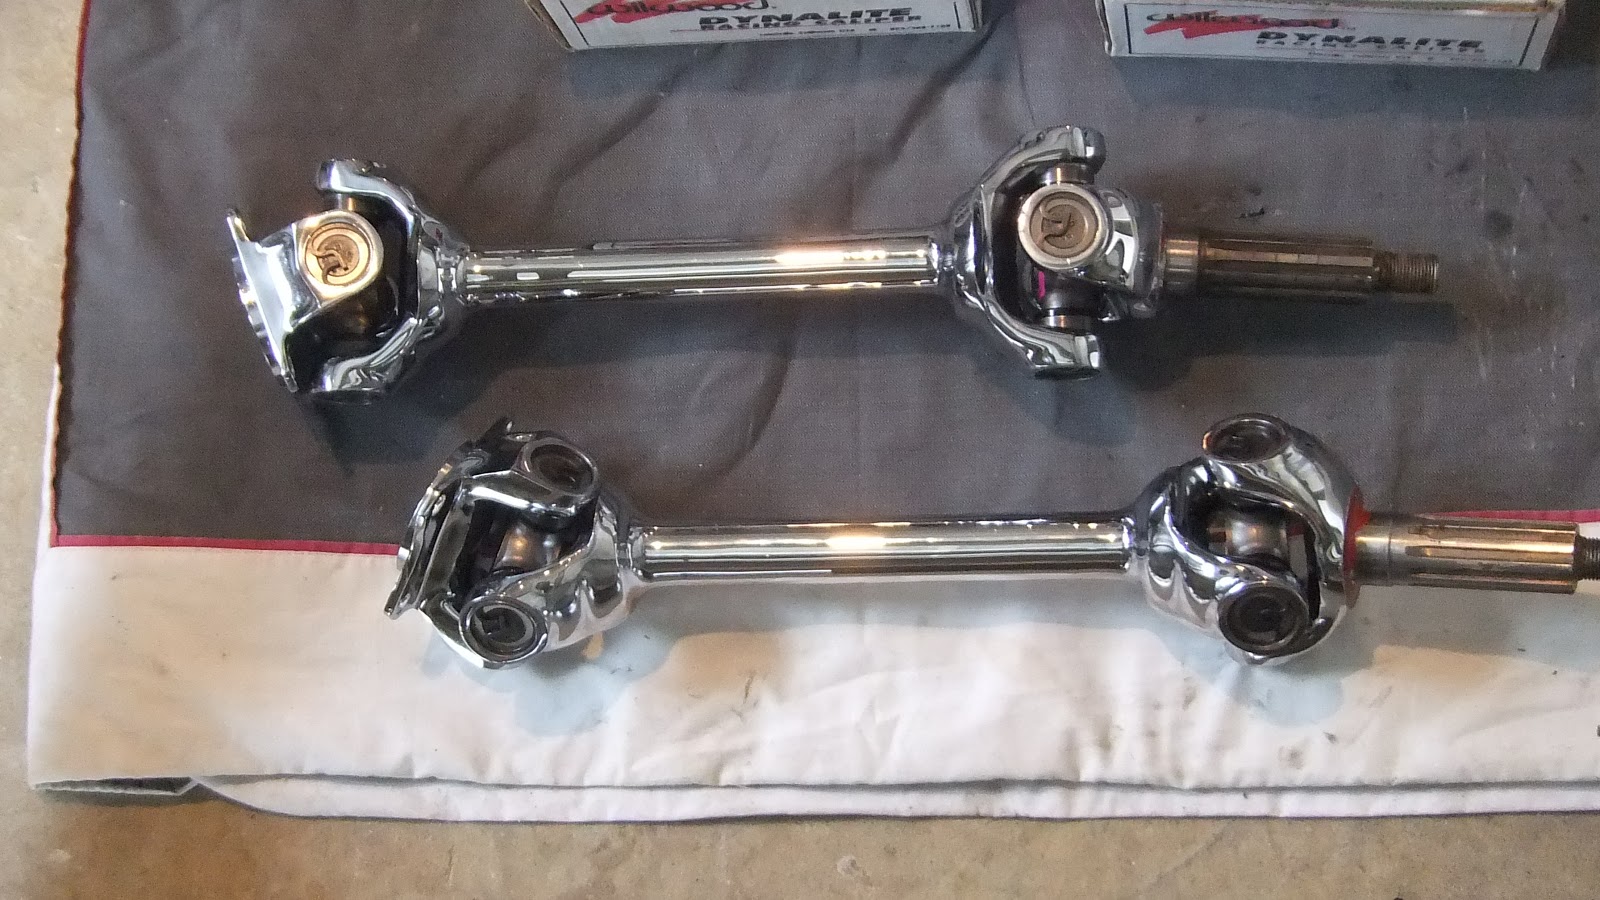
To overcome this it was necessary to have the holes carefully machined to remove the excess chrome first. Then it was possible for Pete to put all the bits together. The machinist and Pete both did a fantastic job. Here is the final result. Very happy!

The next step will be to have some alloy caps machined to cover the ends of the bearing cups and the circlips. This will dress the axles up even more. Watch for an upcoming blog on this.
Oh well I should go now....potentially a big day tomorrow with the certifier coming for the first inspection and to get the build onto the certification register. I'll let you know how that all went in my next blog.
That came up really well Colin, The little caps you are having machined do they have to be alloy? I'm just wondering if 316 stainless would be better to prevent a reaction between the dis similar metals. we get alot of alloy and steel parts that fuse together due to the reaction and an ugly white oxide from the alloy grows where the 2 metals touch. Just a thought :)
ReplyDeleteYeah but that's probably because you are putting 11000 volts through them on those power lines Adam :-)
ReplyDeleteGood tip though mate thanks.
Nice video on the U-joints Colin, and the chrome looks great!! If your going to make some kind of caps to cover the ends of the U-joints, how about painting or plating them to match something else on the car? By doing this it would give some contrast to all that nice chrome you have.....just a thought.
ReplyDeleteCheers Kevin, yeah I had thought about painting them until I was following a Model A Pickup with a chromed Jag rear recently. I have to say I was blown away by how cool the rotating axles and universals looked all sparkling away in chrome. I reckon with paint you'd lose some of that effect so I kind of have my heart set on polished or chromed caps.
ReplyDelete